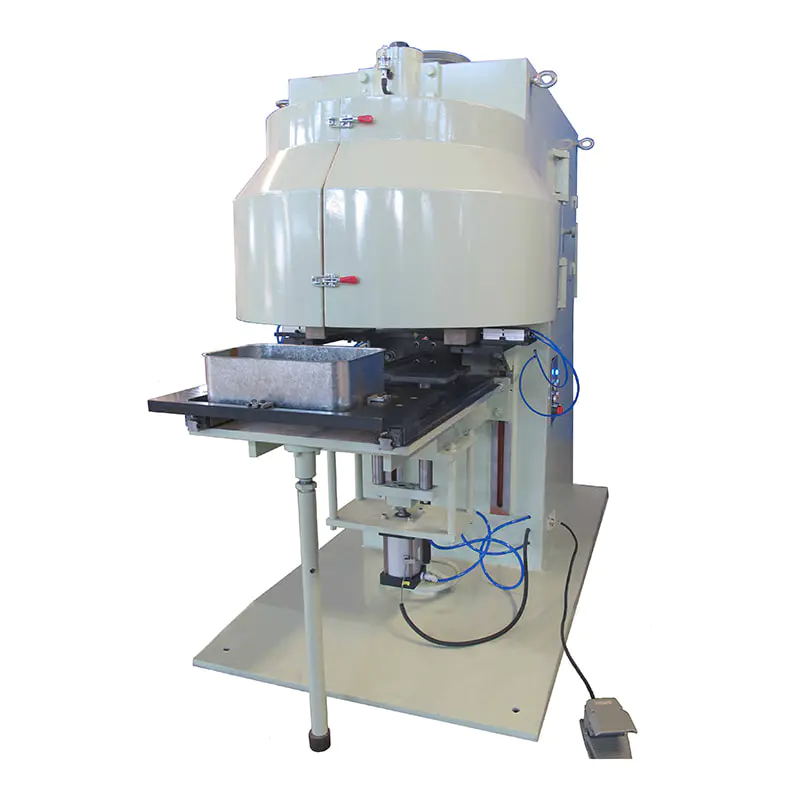
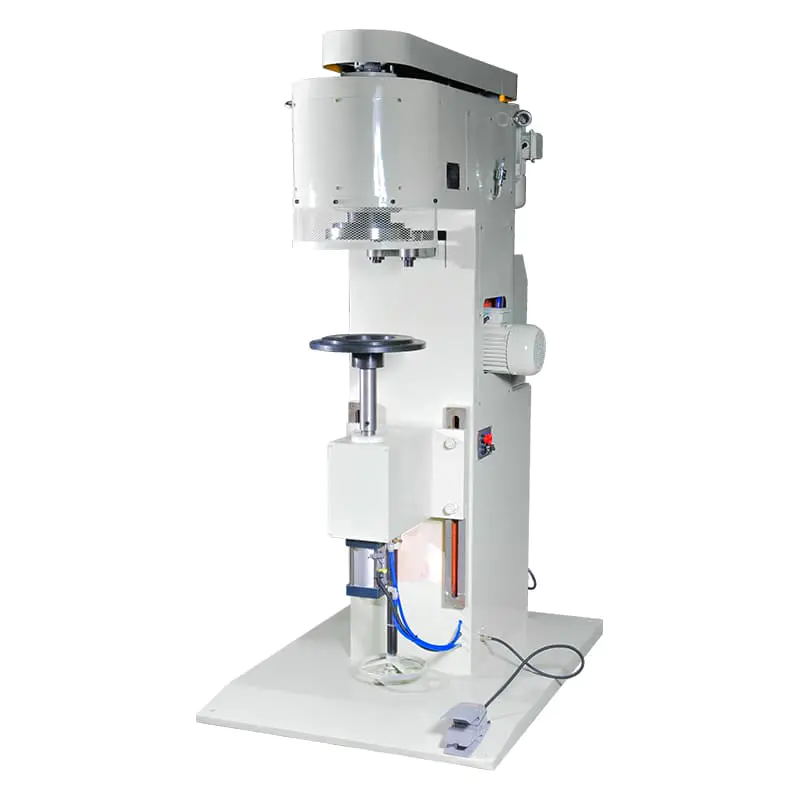
The most common malfunctions when using a sealing machine — particularly automatic can seaming machines — include incomplete or loose seams, leaking seals, wrinkled or deformed lids, inconsistent seam thickness, feed and conveying jams, abnormal noise during operation, and electrical or control system faults. Each of these issues has identifiable root causes and, in most cases, practical corrective actions that can be applied without replacing major machine components. Recognizing the early signs of each malfunction is critical to maintaining production quality, preventing product contamination, and avoiding costly unplanned downtime.
Automatic seaming machines integrate multiple functional modules — including conveying, positioning, seaming, and inspection systems — all coordinated by precision servo motors and control systems. When any one of these modules underperforms or fails, the effects cascade across the sealing process. Understanding how each failure mode develops, what it looks like, and how to correct it is essential knowledge for operators and maintenance personnel working with metal can, drum, and pail production lines.
Incomplete or Loose Seams
An incomplete or loose seam is one of the most serious malfunctions in can seaming operations. A seam that does not fully interlock the lid flange with the can body flange fails to provide the hermetic seal required for product safety, shelf life, and container integrity. In pressurized or vacuum-packed products, even a marginally loose seam can lead to immediate seal failure under distribution conditions.
Root Causes
- Worn or incorrectly profiled seaming rolls: The first and second operation seaming rolls are precision-machined components that gradually wear with use. When roll grooves deviate from specification — typically beyond 0.05 mm of design tolerance — the seam profile changes and the interlock depth becomes insufficient. Roll wear is the single most frequent root cause of loose seams in high-volume production.
- Incorrect seaming roll pressure settings: Roll pressure is calibrated for specific can dimensions and material gauges. Insufficient first-operation roll pressure prevents complete curl forming; insufficient second-operation pressure leaves the seam thick and insufficiently ironed, reducing overlap and tightness.
- Lid or end panel out of specification: Lids with flange dimensions outside tolerance — even by 0.1 to 0.2 mm — do not form correctly against the can body flange. This is a supplier-side issue but must be detected at incoming inspection to prevent production-scale seam quality problems.
- Inadequate or degraded sealing compound: The sealing compound applied to the lid curl provides the final hermetic barrier within the seam. Compound that has dried out, been applied too thinly, or degraded from age or temperature exposure produces seams that pass visual inspection but leak under pressure testing.
- Chuck wear or damage: The chuck holds the can lid during the seaming operation. A worn or damaged chuck allows micro-movement of the lid during seaming, producing inconsistent seam geometry across the circumference.
Corrective Actions
- Measure seaming roll profiles against the manufacturer's specification using a roll profile gauge at the intervals prescribed in the maintenance schedule — typically every 500,000 to 1,000,000 seams for high-speed machines.
- Perform a full seam teardown and measurement using a seam scope or optical comparator whenever incomplete seams are detected. Measure cover hook, body hook, overlap, countersink depth, and seam thickness against specification for each can format being run.
- Verify incoming lid dimensions against the seaming specification sheet before approving new batches of lids for production.
- Inspect sealing compound condition and application rate. The compound should be uniformly applied around the full circumference of the lid curl with no gaps or thinned areas.
Seam Leakage After Completion
Seam leakage is distinct from an incomplete seam in that the seam may appear geometrically correct on external inspection but still fails to provide a hermetic barrier. This type of malfunction is particularly dangerous in food, beverage, and chemical packaging because it is not always visible and can result in product contamination, spoilage, or regulatory non-compliance without triggering an immediate production stop.
Causes Specific to Leaking Seams
- Vee or droop defects in the seam: A vee occurs when the body hook folds improperly, creating a V-shaped gap within the seam layers. A droop occurs when part of the seam hangs lower than the rest, often caused by excessive first-operation roll pressure at a single point. Both defects create pathways for leakage even when the overall seam dimensions appear acceptable.
- Jump-over or cut-through defects: These occur when the seaming roll skips over or cuts through the material at a point of localized stress — often at the can side seam junction, where three or four layers of metal meet. The increased material thickness at this point requires specific roll pressure compensation that is lost when roll pressure is set for average seam conditions only.
- Sealing compound voids: Gaps in sealing compound application allow moisture, oxygen, or product to bypass the metal interlock. Compound voids are caused by clogged compound applicator nozzles, too-low compound viscosity, or lid storage in low-temperature environments that cause the compound to stiffen before application.
- Excessive seam tightness causing metal fracture: Over-tightened second-operation rolls can thin the metal at the seam to the point of micro-cracking, which produces a seam that tests acceptable in immediate post-seam inspection but develops hairline leaks during distribution under vibration and pressure cycling.
Detection Methods
- Conduct air pressure decay testing at a frequency of at least one can per 1,000 produced, or more frequently when material changes or tooling adjustments have occurred. Pressure decay testing detects seam leaks that are invisible to visual inspection.
- Perform seam teardown inspections and check for compound coverage within the seam. A lack of compound impression on the body hook surface after teardown indicates compound void at that location.
- Use a seam X-ray or CT scan system for critical products where destructive testing cannot be applied to every sample and non-destructive verification is required.
Wrinkled, Buckled, or Deformed Lids
Lid deformation during seaming is a visible malfunction that affects both the functional integrity of the seal and the appearance of the finished product. Wrinkled lids indicate that the material has been worked beyond its forming limits or that the forming sequence is out of balance. Buckled can bodies suggest that downward seaming pressure or chuck pressure is being applied unevenly or excessively.
Common Causes
- Excessive first-operation roll pressure: Applying too much pressure during the curl-forming first operation over-works the lid flange, causing wrinkles to form as the metal is compressed faster than it can flow smoothly into the seam geometry.
- Lid panel too thin for the seaming parameters: When lid material gauge is reduced — either by design change or supplier variation — the same roll pressure that worked correctly for heavier gauge material becomes excessive, causing wrinkling and deformation.
- Misaligned seaming head: A seaming head that is not concentric with the can and chuck axis subjects the lid to uneven pressure around its circumference. The portions of the lid receiving higher-than-average pressure wrinkle, while those receiving less pressure produce an under-formed seam.
- Incorrect chuck diameter or profile: A chuck that does not match the lid's countersink dimensions fails to support the panel correctly during seaming, allowing the panel to flex and deform under roll pressure.
- Damaged or contaminated seaming roll surfaces: Nicks, burrs, or metal deposits on roll surfaces create point-load pressure spikes that locally deform the lid material at the contact point, producing irregular wrinkling patterns.
Corrective Actions
- Reduce first-operation roll pressure in small increments — typically 0.05 to 0.1 mm adjustments — and re-evaluate seam teardown measurements after each adjustment to find the minimum effective pressure that produces a correctly formed curl without wrinkling.
- Check seaming head concentricity using a dial indicator with the machine in its set position. Concentricity deviation greater than 0.05 mm requires head alignment correction before resuming production.
- Inspect seaming roll surfaces under magnification. Any burr, nick, or adhered metal deposit on the roll groove must be addressed by roll cleaning, polishing, or roll replacement before the defect replicates across subsequent cans.
Inconsistent Seam Dimensions Across Production Run
When seam measurements vary significantly from can to can — even within a single production run with no intentional process changes — the machine is exhibiting dimensional inconsistency. This malfunction is particularly insidious because individual cans may pass seam inspection while the process as a whole lacks the stability needed for reliable quality assurance.
Sources of Dimensional Variation
- Worn seaming roll bearings: When the bearings supporting the seaming roll shaft develop play, the roll position varies slightly with each revolution. This produces seam dimensions that fluctuate within a range rather than holding a consistent value. Bearing play of as little as 0.03 mm can produce visible variation in seam thickness measurements.
- Loose or improperly locked roll adjustment mechanisms: After roll pressure adjustments, if the locking mechanisms are not fully secured, vibration during operation gradually shifts the roll position back toward its original setting. The result is a seam that starts at the adjusted setting and drifts over the course of a production run.
- Variation in incoming can body height: Can body height variation outside the seaming machine's self-compensation range causes the seaming head to engage at slightly different positions relative to the body flange on each can, producing seam geometry variation proportional to the body height variation.
- Thermal expansion during warm-up: Seaming machines that have not reached full operating temperature produce different seam dimensions than those at equilibrium. Many manufacturers require a 15 to 30 minute warm-up period and a series of setup cans before committing production runs to quality records, specifically because thermal expansion of the machine frame and tooling affects roll positions measurably.
- Servo motor or control system instability: Advanced seaming machines using servo-controlled positioning depend on the control system maintaining precise position commands throughout the seaming cycle. Servo tuning drift, encoder signal noise, or control board faults can introduce cyclical position errors that repeat at the servo update frequency.
Conveying and Feed System Jams
Feed and conveying system jams stop production entirely and, if the jam occurs while a can is partially engaged with the seaming tooling, can damage tooling, distort cans, and require significant time to clear safely. Jam frequency is one of the most direct indicators of overall machine health and is closely tracked as a key performance indicator in high-volume production environments.
Feed Jam Causes at the Lid Infeed
- Lid magazine misalignment: The lid magazine must be precisely aligned with the lid pickup mechanism. Misalignment by more than 0.5 mm causes lids to feed at an angle, jamming in the feed track before reaching the seaming station.
- Lids stuck together due to compound tackiness: In warm or humid production environments, the sealing compound on adjacent lids in the magazine can bond slightly, causing two lids to feed simultaneously and jam the single-lid feed mechanism.
- Worn or damaged lid feed fingers or star wheels: Feed fingers and star wheels that control lid spacing become worn at contact points over time, leading to inconsistent spacing and occasional simultaneous feeding of multiple lids.
- Lids outside dimensional specification: Lids with out-of-tolerance flange diameters or curl geometry do not pass cleanly through the feed track, causing blockages at the tightest points of the feed path.
Can Body Feed and Discharge Jams
- Conveyor speed mismatch: When the speed of the infeed conveyor does not match the seaming machine's cycle rate, can bodies arrive either too early (causing stacking) or too late (causing gaps that the machine interprets as faults and stops for). Synchronization must be verified during setup and after any speed changes to either the filler or the seamer.
- Can body deformation from upstream processes: Dented or out-of-round can bodies do not seat correctly in the seaming station's can support, causing the can to tip or rotate incorrectly during seaming and jamming on discharge.
- Worn or contaminated can support surfaces: The turntable pockets, lifter pads, or support plates that position the can body for seaming accumulate product residue and debris over time. Contamination prevents cans from seating at the correct height, and worn support surfaces allow lateral movement during the seaming cycle.
Preventive Measures for Feed System Reliability
- Clean all feed tracks, star wheels, and conveyor surfaces at the start and end of each production shift. Accumulated product, compound, and metal debris are the primary sources of sporadic jams in otherwise well-adjusted machines.
- Check and record jam frequency per shift. An increase in jam frequency — even without a change in jam severity — is an early warning of progressive wear in feed system components before a complete jam-causing failure occurs.
- Inspect star wheel and feed finger contact surfaces at planned maintenance intervals and replace when wear depth exceeds 0.3 mm at contact points.
Abnormal Noise During Seaming Operation
Abnormal noise during seaming machine operation is one of the most reliable early warning signals of developing mechanical faults. Each type of abnormal sound corresponds to a specific failure mode, and identifying the sound type and location allows maintenance personnel to diagnose the underlying cause before it progresses to a production-stopping failure.
Noise Type Diagnostic Reference
Diagnostic reference for abnormal sounds produced by seaming machines, their typical causes, and recommended immediate actions
| Sound Type |
Location |
Most Likely Cause |
Urgency |
Recommended Action |
| Rhythmic clicking |
Seaming head area |
Worn or pitted seaming roll bearing |
High |
Stop at next scheduled break; replace bearing |
| Metallic scraping |
Seaming roll contact zone |
Metal debris on roll surface or roll scoring |
Immediate |
Stop machine; inspect and clean or replace roll |
| Intermittent banging |
Infeed or discharge |
Can body impact from misaligned conveyor guide |
Moderate |
Adjust guide rail clearances; inspect for wear |
| High-frequency whine |
Drive motor or gearbox |
Gear tooth wear or insufficient lubrication |
High |
Check lubrication levels; inspect gear contact surfaces |
| Rattling at idle |
Machine frame or covers |
Loose fasteners or access panel vibration |
Low |
Identify and tighten during next maintenance window |
| Thudding on each cycle |
Chuck or lifter mechanism |
Chuck drop spring failure or lifter cam wear |
Immediate |
Stop machine; inspect chuck assembly and cam follower |
Operators should be trained to recognize baseline machine noise and report deviations as early as possible. A machine generating abnormal sounds but otherwise producing acceptable seams is in a transitional failure state — the seam quality will degrade as the underlying mechanical fault progresses, often suddenly rather than gradually.
Electrical and Control System Faults
Modern automatic seaming machines rely on sophisticated servo motor systems, programmable logic controllers (PLCs), and precision sensors to coordinate the multiple functional modules involved in the seaming process. Electrical and control system faults can manifest as sudden stops, erratic machine behavior, incorrect speed or pressure outputs, or failure to complete the seaming cycle correctly.
Servo Motor and Drive Faults
Servo-controlled seaming machines use servo motors to achieve precise positioning of the seaming rolls, chuck, and conveying mechanisms. Servo faults typically generate specific fault codes on the machine's HMI (human-machine interface) display. Common servo fault categories include:
- Overcurrent faults: Triggered when a servo motor draws more current than its rated limit — often caused by a mechanical obstruction in the driven axis, excessive load from worn bearings, or incorrect gain settings in the servo drive parameters.
- Encoder signal loss: The encoder provides position feedback to the servo drive. A damaged encoder cable, contaminated encoder disk, or loose encoder mounting causes loss of position feedback, causing the drive to fault out as a safety response to prevent uncontrolled movement.
- Following error faults: These occur when the actual motor position lags behind the commanded position by more than the drive's configured tolerance — indicating that the motor cannot keep up with the demanded motion profile due to mechanical load, drive tuning issues, or motor degradation.
Sensor and Safety Circuit Faults
- Can presence sensor failure: Inductive or photoelectric sensors detect whether a can is correctly positioned before the seaming cycle initiates. A contaminated sensor lens, misaligned sensor, or failed sensor causes either false stops (the machine halts because it does not detect a can that is present) or missed detections (the machine cycles without a can in position, potentially damaging tooling).
- Lid presence sensor failure: Similar to can presence sensors, lid detection sensors verify that a lid has been correctly placed before the chuck descends. Failures here cause either continuous false stops or, more dangerously, seaming attempts with no lid in position.
- Safety guard interlock faults: Access guards on seaming machines are connected to the safety circuit through interlocks. Worn interlock switches, corroded contacts, or damaged wiring cause sporadic safety fault trips that stop the machine without any actual guard opening. These faults are often intermittent and difficult to diagnose without systematic electrical testing of each interlock in the safety chain.
- PLC program faults or memory errors: Power supply fluctuations, static discharge, or long-term memory cell degradation can corrupt PLC program data or parameter tables, causing the machine to behave inconsistently or refuse to start. Maintaining a verified backup of the PLC program and all servo drive parameters on a separate storage device is a critical maintenance practice that allows rapid recovery from this fault type.
Electrical Fault Response Protocol
- Record the exact fault code and the machine state at the time of the fault (speed, cycle position, which station was active).
- Check the fault history log on the HMI for any preceding faults or warnings that may have led to the current condition.
- Do not repeatedly reset and restart without investigating the root cause — repetitive resets of an underlying electrical fault can escalate a minor sensor issue into a motor or drive failure.
- Verify power supply voltage and stability at the incoming panel before suspecting internal machine electrical components.
- Consult the machine's electrical schematic and the fault code reference in the service manual before replacing any electrical component.
Lubrication Failures and Their Effects on Seaming Quality
Seaming machines contain numerous precision bearing surfaces, cam followers, gear trains, and sliding components that require consistent lubrication to function correctly. Lubrication failures are among the most preventable causes of seaming machine malfunction, yet they account for a significant proportion of unplanned maintenance events in facilities without rigorous lubrication programs.
- Under-lubrication of seaming roll bearings: Seaming roll bearings operate under significant cyclical load and require lubrication at intervals specified by the machine manufacturer — typically every 8 to 40 operating hours depending on machine speed and load. Under-lubricated bearings develop increased rolling element wear that progresses to bearing failure, producing variable seam dimensions and ultimately seaming head seizure.
- Lubricant contamination: Product residue, metal particles from worn components, or water ingress can contaminate the lubricant in bearing housings and gearboxes. Contaminated lubricant loses its protective film strength and accelerates wear rather than preventing it. Oil analysis of gearbox fluid at intervals of every 2,000 to 4,000 operating hours can detect contamination before it causes component damage.
- Incorrect lubricant specification: Using a lubricant with incorrect viscosity or formulation for the machine's operating temperature and load conditions provides inadequate film thickness at operating conditions, even when the lubrication schedule is followed correctly. Always use the lubricant type and grade specified in the machine's maintenance manual for each lubrication point.
- Over-lubrication of certain components: Excess lubricant in sealed bearing assemblies or on cam surfaces can attract metal debris and form an abrasive paste that accelerates wear rather than reducing it. Follow the manufacturer's specified quantities for each lubrication point precisely.
- Automatic lubrication system malfunction: Machines equipped with centralized automatic lubrication systems rely on pump, line, and metering valve integrity to deliver correct quantities at the right time. A blocked lubrication line or failed pump can leave multiple bearing points unlubricated simultaneously without triggering an obvious alarm, making periodic manual verification of lubrication delivery an important supplement to automated systems.
Sealing Machine Malfunction Summary and Troubleshooting Reference
The following table provides a consolidated reference of the most common sealing machine malfunctions, their primary causes, and the recommended first response action for each:
Quick-reference troubleshooting guide for common sealing machine malfunctions encountered in metal can production operations
| Malfunction |
Primary Cause |
Secondary Cause |
First Response |
Stop Production? |
| Loose or incomplete seam |
Worn seaming rolls |
Incorrect roll pressure |
Seam teardown and measurement |
Yes |
| Seam leakage |
Compound void or vee defect |
Jump-over at side seam |
Pressure decay test; teardown inspection |
Yes |
| Wrinkled or buckled lid |
Excessive first-op roll pressure |
Seaming head misalignment |
Reduce pressure; check concentricity |
Yes — if leakage suspected |
| Dimensional inconsistency |
Worn roll bearings |
Thermal expansion during warm-up |
Check bearing play; verify warm-up time |
Reduce to sample verification pace |
| Feed or conveyor jam |
Magazine misalignment |
Out-of-spec lids or can bodies |
Clear jam; inspect feed track and guides |
Yes — until jam cleared |
| Abnormal noise |
Bearing or gear wear |
Metal debris in roll groove |
Identify source; inspect at next break |
Depends on severity |
| Electrical fault code |
Servo or sensor failure |
Safety interlock fault |
Record fault code; investigate before reset |
Yes — machine stops automatically |
| Lubrication failure |
Missed lubrication interval |
Auto-lube system blockage |
Manually lubricate; verify auto-lube delivery |
No — if caught early |
Preventive Maintenance Practices That Reduce Malfunction Frequency
The most effective approach to sealing machine malfunction management is prevention rather than reaction. Facilities that implement structured preventive maintenance programs consistently report 30 to 60% lower unplanned downtime compared to those that operate on a reactive maintenance basis. The following practices form the foundation of an effective seaming machine preventive maintenance program:
- Daily pre-production inspection checklist: Before each production run, operators should verify lubrication levels, clean all feed tracks and sensor lenses, check seaming roll condition visually, confirm that the warm-up cycle has been completed, and run a set of setup cans for seam teardown measurement before releasing the machine for production.
- Scheduled seam quality sampling: Perform seam teardown measurements at the start of each shift, after any process change, and at a minimum frequency of one teardown per hour of production during standard operation. Document all measurements and trend the data to detect gradual drift before it reaches the specification limit.
- Tooling replacement based on seam count rather than condition alone: Seaming rolls, chucks, and bearings should be replaced at specified seam count intervals — typically every 500,000 to 2,000,000 seams depending on the component and can format — regardless of whether visible wear is apparent. This practice prevents the unpredictable failure of a component that has reached the end of its design life but has not yet produced a detectable defect.
- Maintaining a seam measurement history log: A machine that is producing seams consistently at the center of the specification range is in a fundamentally different state from one producing seams at the edges of the range, even if both pass inspection. A measurement history log reveals trend direction and allows proactive adjustment before a specification exceedance occurs.
- Keeping critical spare parts in stock: Seaming rolls, chuck assemblies, feed fingers, key bearings, and commonly faulting sensors should be stocked as on-site spares. The lead time for specialized seaming machine components can be weeks to months from some manufacturers, and a machine grounded waiting for a seaming roll represents a disproportionate cost relative to the value of holding inventory of these parts on site.
- Operator training in fault recognition: Machine operators who understand what a normal seam looks and feels like — and who are trained to recognize the early physical and audible signs of developing faults — provide the earliest possible warning of malfunction. Automated inspection systems are valuable but are not a substitute for a trained, attentive operator who understands the seaming process from first principles.


 +86 13666712509

 English
 русский
 عربى
عربى


Contact Us