A 1-5L square can production line is a fully automated industrial system that transforms flat metal sheets into finished, sealed square cans ready for filling and distribution. The process follows a structured sequence: sheet feeding → can body forming → welding → internal/external coating → drying → expanding → flanging → seaming → inspection → stacking. Each stage is tightly integrated so that output rates of 30 to 120 cans per minute are achievable depending on capacity configuration. This line serves the food, beverage, lubricant, chemical, and pharmaceutical industries, where square cans from 1 L to 5 L are the dominant packaging format.
Understanding each step in detail allows plant engineers, procurement managers, and production supervisors to evaluate equipment, plan facility layouts, and optimize throughput. The sections below walk through every stage of the production flow.
Raw Material Preparation and Sheet Feeding
The line begins with tinplate or tin-free steel (TFS) coil or pre-cut sheets, typically 0.18 mm to 0.32 mm in thickness. Thicker gauges (0.28–0.32 mm) are used for 4 L and 5 L cans that must withstand greater stacking loads and internal pressure from chemical contents, while thinner gauges suit smaller 1 L food-grade cans.
An automatic sheet feeder with a vacuum suction cup system picks individual sheets from the stack and sends them to the slitting and blanking station. Sensors detect double-feeds or misaligned sheets and eject them before they enter the forming tooling, preventing costly tooling damage.
- Sheet thickness tolerance: ±0.01 mm for consistent forming quality
- Typical tinplate hardness grade: T2–T4 (DR8 for demanding applications)
- Sheet feeding speed synchronized with downstream forming speed
- Lubrication station applies a thin oil film to reduce tooling wear
Can Body Blanking and Forming
At the blanking station, a high-speed stamping press cuts the sheet into precise blanks sized for the target can dimensions. For a standard 1 L square can, the blank might measure approximately 230 mm × 160 mm; for a 5 L square can, a blank of roughly 450 mm × 320 mm is typical — though exact dimensions vary with can height-to-width ratios.
The blank is then fed into the can body forming machine, which uses a series of bending dies to fold the flat blank into a rectangular tube shape. Corner notches cut during blanking allow clean, tight bends at the four vertical edges of the square can body. A lock-seam or hook-seam joint is formed along the vertical side seam, holding the body shape before the next welding step.
Key Forming Parameters
| Can Size |
Approximate Body Blank Size |
Typical Can Height |
Body Seam Type |
| 1 L |
~230 × 160 mm |
~130 mm |
Lock seam / Welded |
| 2.5 L |
~330 × 220 mm |
~190 mm |
Lock seam / Welded |
| 4 L |
~400 × 290 mm |
~240 mm |
Welded |
| 5 L |
~450 × 320 mm |
~280 mm |
Welded |
Indicative blank and body dimensions for common square can sizes (actual values vary by tooling design)
Side Seam Welding
Welding is one of the most critical steps for can integrity. Modern 1-5L square can lines use high-frequency electric resistance welding (ERW) or laser welding to join the vertical side seam. ERW operates at frequencies of 150 kHz to 450 kHz, generating enough heat to fuse the overlapping seam edges in milliseconds without adding filler material. The result is a weld bead only 0.3–0.5 mm wide — narrow enough that the seam area remains structurally equivalent to the parent metal.
Welding speed on high-output lines reaches 60–100 m/min of seam length, allowing production rates compatible with the rest of the line. After welding, an online weld inspection system using eddy current or optical sensors checks every seam for pinholes, cold welds, or burn-through. Cans failing inspection are automatically diverted before they progress further.
- ERW welding: cost-effective, high-speed, suitable for tinplate and TFS
- Laser welding: narrower heat-affected zone, better cosmetic appearance, higher equipment cost
- Seam overlap width: typically 0.4–0.6 mm for ERW
- Weld zone cooling applied immediately after to prevent distortion
Interior and Exterior Coating
Because welding burns off the tin or lacquer layer at the seam, a stripe coating (repair lacquering) step re-applies protective material to the exposed bare steel. This is done by a roll-on or spray applicator positioned immediately after the welder, covering the interior seam with a food-grade epoxy or polyester lacquer. Stripe widths are controlled to 6–10 mm to ensure full coverage without wasting coating material.
For cans destined for corrosive contents — solvents, agrochemicals, or acidic food products — a full interior spray coating is applied after the stripe coat step. The can body passes through a spray booth where nozzles coat the entire inner surface with epoxy phenolic, organosol, or polyester lacquer at a controlled film weight of 5–12 g/m². The exterior may also receive a base coat at this stage to prepare for printing or label application.
Common Lacquer Types by Application
| Lacquer Type |
Typical Application |
Key Property |
| Epoxy Phenolic |
Food, beverage, oil cans |
Excellent chemical resistance, FDA-compliant |
| Organosol |
Aerosol-type or general industrial |
High flexibility, good adhesion |
| Polyester |
Lubricants, coatings, paints |
Solvent resistance, hard film |
| Water-based Epoxy |
BPA-free food packaging |
Low VOC, regulatory compliance |
Lacquer selection depends on contents type, regulatory requirements, and processing temperature
Curing and Drying Oven
After coating, the can bodies pass through a curing oven to harden the lacquer film. Oven temperature profiles are calibrated to the lacquer chemistry: epoxy phenolic coatings typically cure at 180–210 °C for 8–12 minutes, while water-based coatings may require shorter times at slightly lower temperatures. Peak metal temperature (PMT) — not oven air temperature — is the controlling parameter, typically targeted at 190–200 °C for 30–60 seconds.
Modern drying ovens on square can lines use infrared (IR) pre-heating combined with convection zones to achieve rapid, uniform heat transfer while minimizing footprint. Energy recovery systems capture exhaust heat and recirculate it, reducing gas consumption by up to 25–30% compared to older single-pass ovens. After the oven, cans pass through a cooling zone to bring surface temperature below 40 °C before the next forming steps.
Can Body Expanding and Shaping
Square can bodies that have been roll-formed may have slightly imprecise corner radii and sidewall flatness. The expanding machine inserts a shaped mandrel into the can body and pushes it outward to precisely calibrate internal dimensions, squaring the corners and flattening the side walls to tolerances of ±0.2 mm. This step is especially important for 4 L and 5 L cans that must fit nesting trays and palletizing patterns accurately.
On some lines, this station also performs beading — adding horizontal ribs around the can body — to increase column strength under vertical stacking loads. A beaded 5 L square can can withstand up to 30–40% more stacking force than a plain-wall can of the same gauge, allowing thinner material to be used without sacrificing pallet integrity.
Flanging
Before the top and bottom lids can be attached, the open ends of the can body must be flanged — bent outward at a precise angle to create the seaming surface. A flanging machine applies rollers or dies to both ends of the can simultaneously, turning the edge outward by 90° to a controlled flange width of 1.8–2.2 mm.
Flange geometry is critical: too narrow a flange leaves insufficient overlap for a tight double seam; too wide a flange wastes material and can crack at the corners of square cans. Because square cans have corners with lower material ductility than round cans, the flanging tooling must be specifically designed for corner relief to prevent micro-cracks that would later allow leakage.
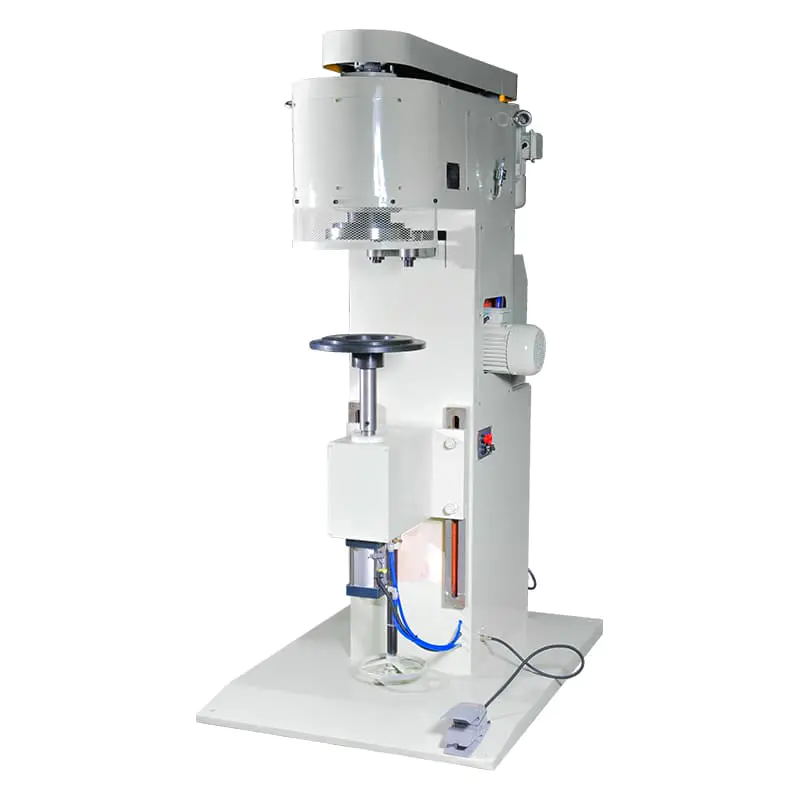
Bottom Seaming
The can bottom lid — pre-cut, formed, and compound-lined in a separate lid press — is placed onto the flanged body and joined by a double seaming machine. Double seaming is a two-operation mechanical interlocking process:
- First operation: The seaming roll curls the lid hook and body hook together, forming the initial interlock
- Second operation: A second roll compresses the seam, flattening it to the final double-seam thickness and ensuring that the sealing compound fills any gaps
A properly formed double seam on a square can has a seam thickness of 1.0–1.3 mm and a height of 2.8–3.2 mm, with body hook overlap of at least 45% of the available overlap length. Seam cross-sections are periodically torn apart for destructive testing to verify these values against specification.
Leak Testing and Quality Inspection
Once the bottom is seamed on, every can on a modern line passes through an online leak detector. The most common method is pressurized air testing: the can is sealed with a test head, pressurized to 15–30 kPa, and held for a defined dwell time. Any pressure drop detected by a transducer triggers automatic rejection. High-speed lines integrate this test into the conveyor flow with zero manual handling, achieving inspection rates of 100+ cans per minute.
Vision inspection systems simultaneously check:
- Seam integrity (height, thickness, visible defects)
- Coating coverage and uniformity
- Can body squareness and dimensional compliance
- Dent, scratch, or surface contamination
Defect rates on well-maintained lines are typically kept below 0.05% — fewer than 5 rejects per 10,000 cans produced.
Printing and Exterior Decoration (Optional Stage)
Many production lines include an integrated offset or digital printing station that applies product labels, safety information, and branding graphics directly to the can exterior before or after coating. Offset printing for square cans typically uses 2 to 6 color stations with UV-curable inks, producing print resolution of 150–200 lpi. For short-run or variable-data applications, digital inkjet printing is integrated instead.
An overvarnish station follows printing to protect the ink layer from abrasion during handling and transport. The varnish is cured in a secondary oven zone. Lines that do not print inline can instead be configured to apply pre-printed labels or to leave the exterior plain for downstream labeling by the filling customer.
Handle and Accessory Attachment
Square cans of 2.5 L and above typically require a carry handle, either a wire bail handle or a stamped steel D-handle. A dedicated handle assembly station rivets or crimps the handle lugs to the can body at defined positions. For 4 L and 5 L cans used for lubricants or paints, a pour spout boss or F-style spout opening may be incorporated into the lid at this stage, providing a leak-free port for dispensing.
Some lines also attach plastic or metal locking caps to the spout threads and apply a tamper-evident ring. These accessories are fed by vibratory bowl feeders and installed by automated pick-and-place heads, maintaining line speed without manual labor.
Palletizing, Stacking, and Output
Finished cans exit the production line via an accumulation conveyor that buffers output and feeds a stacking or palletizing system. Nested stacking (cans placed open-side-up inside each other) maximizes transport density for empty cans shipped to filling plants. A 5 L square can stack of 10 nesting units occupies roughly the same pallet footprint as a single filled can, dramatically reducing logistics costs for empty-can deliveries.
Robotic palletizers arrange stacks on standard pallets (1200 × 1000 mm or 1200 × 800 mm), apply stretch wrap, and output labeled pallets to a warehouse conveyor or forklift pickup point. Production data loggers connected to the PLC record per-pallet output counts, reject rates, and any stoppages, providing traceability from raw material lot to finished pallet.
Automation and Control System
The entire 1-5L square can production line is coordinated by a programmable logic controller (PLC) or distributed control system (DCS) with a human-machine interface (HMI) touchscreen at the main control panel. Operators can switch can size recipes — changing forming tooling speed, oven temperature profiles, and seaming settings — with a few touches, reducing changeover time from hours to under 30 minutes on well-engineered lines.
- Real-time monitoring: speed, temperature, pressure, and reject count displayed live
- Alarm system: automatic line stop on critical fault with fault location displayed
- Recipe management: stored parameters for each can size and material combination
- Remote diagnostics: Ethernet connectivity allows OEM technicians to access the system for troubleshooting
- Energy monitoring: per-station power consumption tracked for OEE and sustainability reporting
Complete Step-by-Step Summary of the Production Flow
The table below consolidates every major step in a typical 1-5L square can production line, its primary function, and the key quality parameter controlled at that stage.
| Step |
Station |
Primary Function |
Key Quality Parameter |
| 1 |
Sheet Feeding |
Separate and feed tinplate sheets |
No double feeds; alignment ±0.5 mm |
| 2 |
Blanking |
Cut sheets to precise blank size |
Blank dimension ±0.2 mm |
| 3 |
Can Body Forming |
Bend blank into rectangular tube |
Corner radius, seam alignment |
| 4 |
Side Seam Welding |
Fuse vertical side seam |
Weld integrity, no pinholes |
| 5 |
Stripe Coating |
Re-lacquer exposed weld seam |
Stripe width 6–10 mm, coverage |
| 6 |
Interior Spray Coating |
Full internal surface protection |
Film weight 5–12 g/m² |
| 7 |
Curing Oven |
Harden lacquer film |
PMT 190–200 °C for 30–60 s |
| 8 |
Expanding |
Calibrate internal dimensions |
Body squareness ±0.2 mm |
| 9 |
Flanging |
Bend open ends outward for seaming |
Flange width 1.8–2.2 mm |
| 10 |
Bottom Seaming |
Attach and double-seam bottom lid |
Seam thickness, hook overlap ≥45% |
| 11 |
Leak Testing |
Detect any seal failure |
Pressure hold at 15–30 kPa |
| 12 |
Printing / Labeling |
Apply exterior graphics |
Print registration, color accuracy |
| 13 |
Handle / Accessory Attachment |
Rivet handle, attach spout or cap |
Rivet pull strength |
| 14 |
Stacking and Palletizing |
Nest, stack, and palletize cans |
Stack count, pallet stability |
Complete production step sequence for a 1-5L square can line with quality control parameters per stage
Why Choose a Dedicated Square Can Line Over General-Purpose Equipment
Square cans present forming and seaming challenges that round-can tooling cannot address: flat side-wall stiffness, corner crack risk during flanging, and rectangular seaming geometry all require specialized dies, rollers, and tension control. A dedicated 1-5L square can production line incorporates these engineering solutions from the ground up, delivering:
- Higher uptime — tooling matched to square-can geometry reduces jamming and scrap
- Consistent dimensional accuracy — calibrated expanding and flanging stations hold tolerances across high-volume runs
- Multi-size flexibility — quick-change tooling allows production of 1 L, 2.5 L, 4 L, and 5 L cans on the same line with minimal changeover
- Lower labor cost — integrated automation from sheet feeding to palletizing reduces headcount to 2–4 operators per shift
- Regulatory compliance — coating, curing, and inspection systems are designed to meet FDA, EU Regulation 1935/2004, and other food-contact or chemical-packaging standards
LK Machinery Co., Ltd., based in Zhoushan City on the coast of the East China Sea, specializes in manufacturing complete 1-5L square can production lines. Its location adjacent to the Yongzhou Cross-sea Expressway and coastal port infrastructure ensures efficient delivery of heavy production equipment to customers across China and internationally. The company provides customized line configurations to match specific can sizes, materials, output speeds, and coating requirements.
 English
 русский
 عربى
عربى


")


Contact Us